> ## Documentation Index
> Fetch the complete documentation index at: https://developer.dromo.io/llms.txt
> Use this file to discover all available pages before exploring further.
# Using Schema Studio
Dromo's Schema Studio streamlines creating a schema, so you can start working with Dromo.
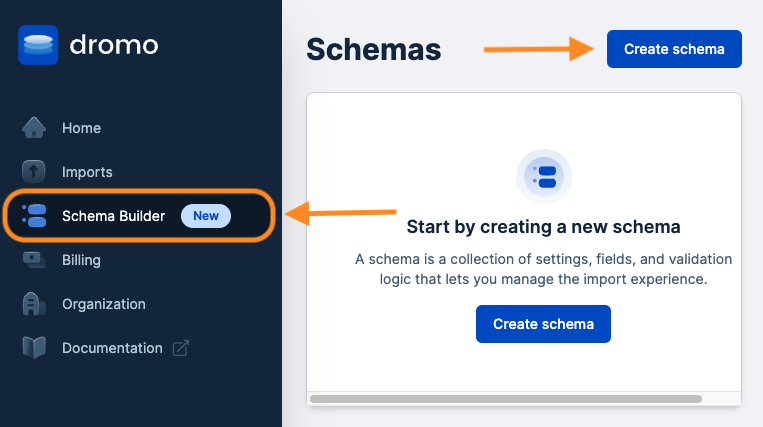
## Creating a Schema[](#creating-a-schema "Direct link to Creating a Schema")
[Click here to get started with Schema Studio now!](https://dashboard.dromo.io/public/schemas/create)
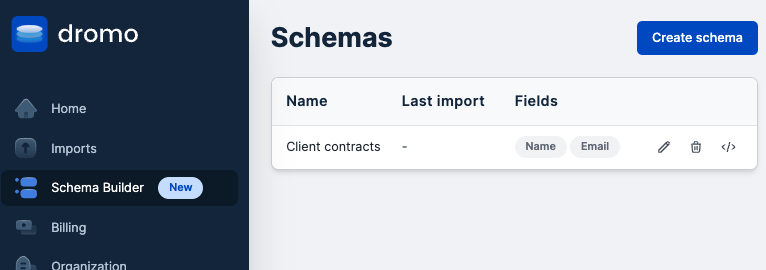
Once you've [logged into](https://dashboard.dromo.io/auth/login) your Dromo account, you can access Schema Studio from your [Dromo dashboard](https://dashboard.dromo.io/schemas). Here, you can create a new schema or update any schemas you've previously created. Click **Create Schema**:
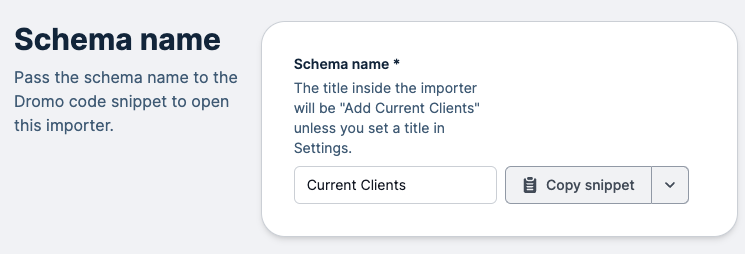 Next, you can customize the importer your end-user interacts with:
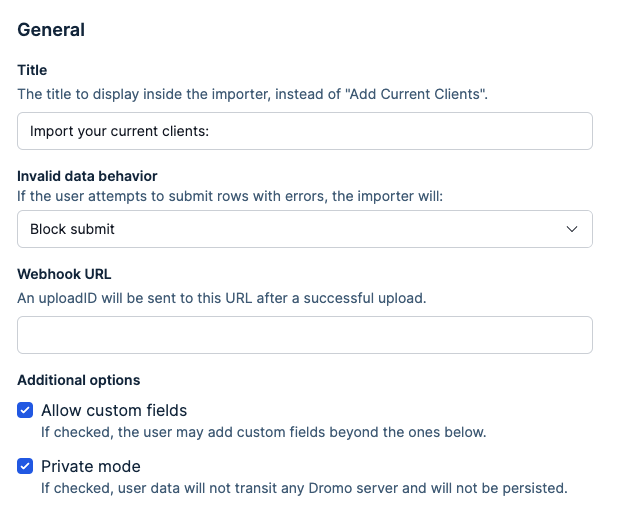 You can optionally configure the importer's:
* title
* behavior for [invalid data](/reference/settings/settings#invaliddatabehavior)
* a [webhook URL](/reference/webhooks) where new submissions are sent
* ability to let users add [custom fields](/reference/settings/settings#allowcustomfields)
* private mode settings
Private mode lets you to control whether user data is sent or persisted through Dromo's servers. Private mode is only available on the [Dromo Pro plan](https://dromo.io/pricing).
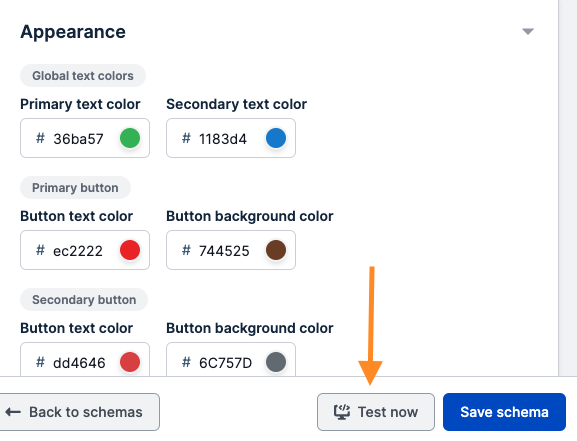
You can also optionally customize your importer's appearance with custom colors. You can preview your Dromo importer's appearance by clicking **Test now** in the footer:
You can optionally configure the importer's:
* title
* behavior for [invalid data](/reference/settings/settings#invaliddatabehavior)
* a [webhook URL](/reference/webhooks) where new submissions are sent
* ability to let users add [custom fields](/reference/settings/settings#allowcustomfields)
* private mode settings
Private mode lets you to control whether user data is sent or persisted through Dromo's servers. Private mode is only available on the [Dromo Pro plan](https://dromo.io/pricing).
You can also optionally customize your importer's appearance with custom colors. You can preview your Dromo importer's appearance by clicking **Test now** in the footer:
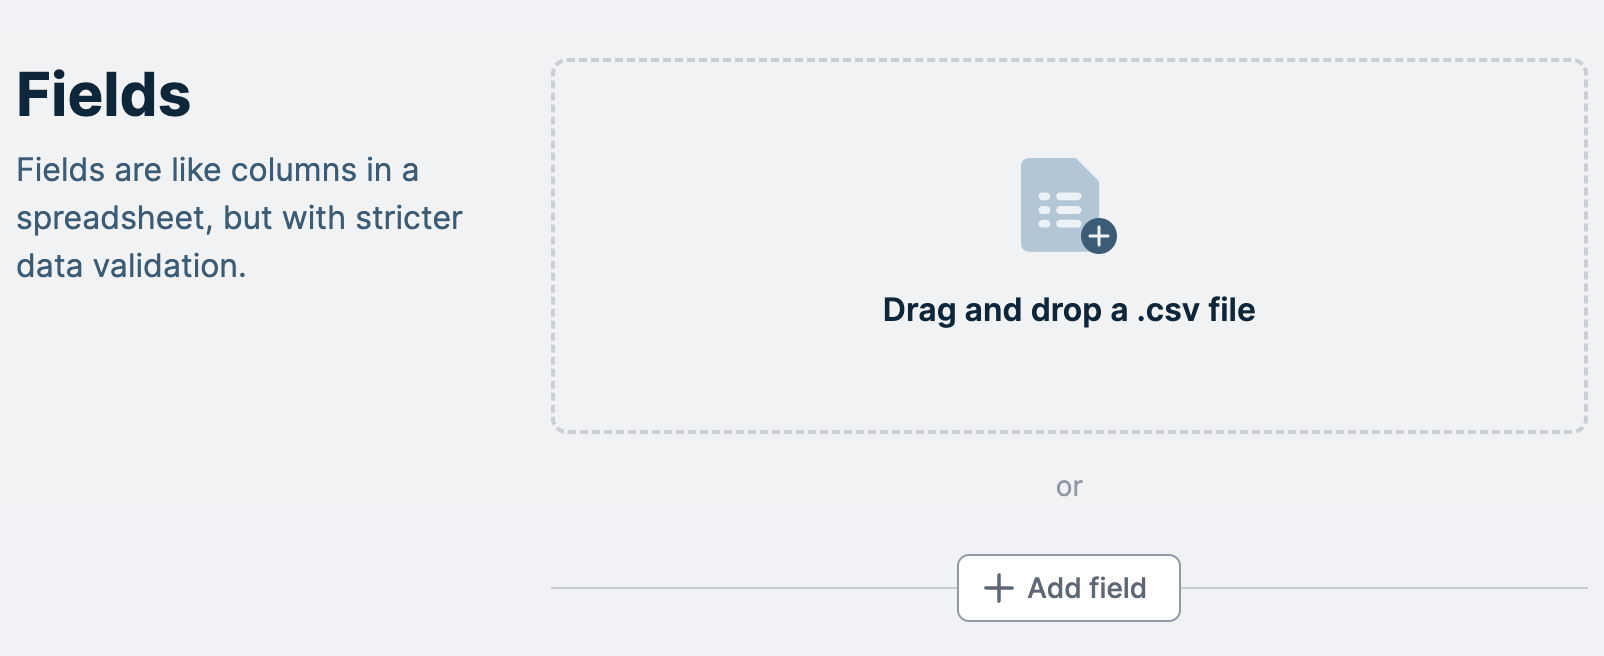
 Next, you'll define your schema's fields. You can think of a schema's [fields](/reference/fields) like columns in a spreadsheet.
If you are importing your user-collected data into a database, you'll want your data to be in the shape your database table expects. This means your schema's fields usually match the columns in your database. For example, let's say you have a client database table with two columns for clients' names and emails. Your schema would have two fields to match your database table; one for our clients' names and a second for their emails.
You can add fields in two ways:
1. Importing a CSV and letting Schema Studio automatically detect the field and types.
2. Manually clicking the **Add field** button.
Next, you'll define your schema's fields. You can think of a schema's [fields](/reference/fields) like columns in a spreadsheet.
If you are importing your user-collected data into a database, you'll want your data to be in the shape your database table expects. This means your schema's fields usually match the columns in your database. For example, let's say you have a client database table with two columns for clients' names and emails. Your schema would have two fields to match your database table; one for our clients' names and a second for their emails.
You can add fields in two ways:
1. Importing a CSV and letting Schema Studio automatically detect the field and types.
2. Manually clicking the **Add field** button.
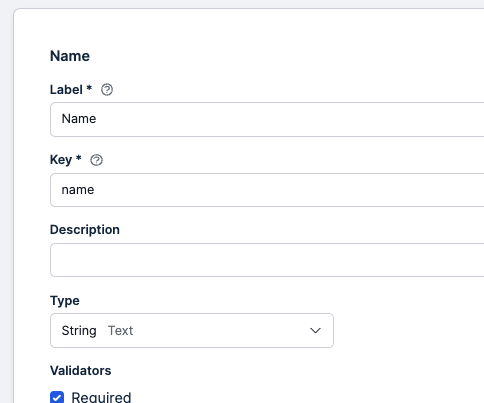
 Once you've added a new field, clicking on the name of that field enables you to customize or delete it. You can customize a field's:
* Label: The column name your users see in the importer.
* Key: The field's unique identifier is this field's key in the JSON results.
* Description: A description for this field that your users will see in the importer.
* Type: The [type](/reference/fields/field-types) of data your user should input (e.g., email, date, text, etc.).
Once you've added a new field, clicking on the name of that field enables you to customize or delete it. You can customize a field's:
* Label: The column name your users see in the importer.
* Key: The field's unique identifier is this field's key in the JSON results.
* Description: A description for this field that your users will see in the importer.
* Type: The [type](/reference/fields/field-types) of data your user should input (e.g., email, date, text, etc.).
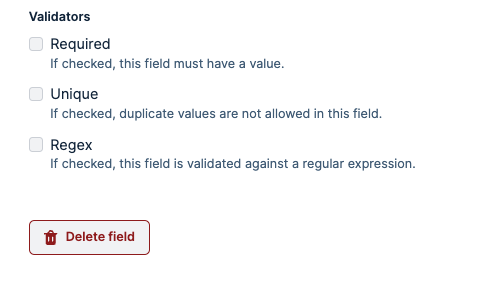
 Additionally, you can use [**validators**](/reference/fields#validators) to enforce rules for the data a user is allowed to import. You can choose to make a field required, unique, follow a particular [Regex](https://en.wikipedia.org/wiki/Regular_expression) pattern, or any combination of the above:
 You can try out your importer settings and fields in real-time using the **Test now** button on the footer on the screen:
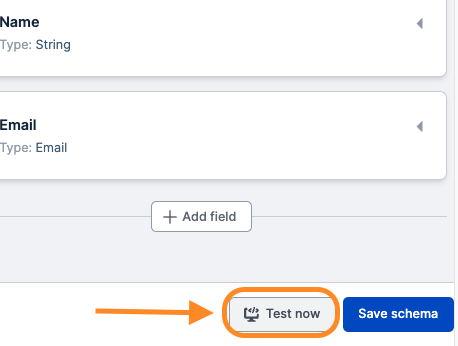 Once you've customized your schema, click **Save schema**. You'll be redirected to the main Schema Studio page, where you can see your new schema:
 ## Using Schemas
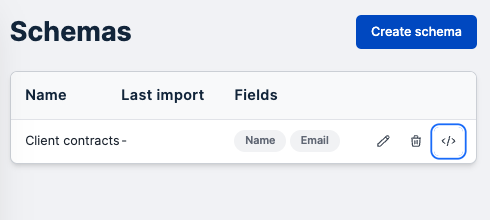
To start using a schema in your application, click on the angled brackets icon in the Schemas Tab in the Dashboard:
## Using Schemas
To start using a schema in your application, click on the angled brackets icon in the Schemas Tab in the Dashboard:
 Copy and paste the pop-up code block into your own website's code and you're done! 🎉 You should be able to test the flow now.
You can see your user's imports from the [**Imports** Tab](https://dashboard.dromo.io/imports) in your Dromo dashboard.
However, to integrate into your application, you will still need to handle the data, which you can do via the [`onResult` callback](/reference/results).
```javascript JavaScript theme={null}
dromo.onResults((response, metadata) => {
// Connect to our database
db.connect();
// create new entries in our database using the user's imported data
db.uploadData(response);
});
```
```jsx React theme={null}
// Connect to our database
db.connect();
// create new entries in our database using the user's imported data
db.uploadData(response);
}
>
```
## Advanced Usage
### Assigning User Metadata
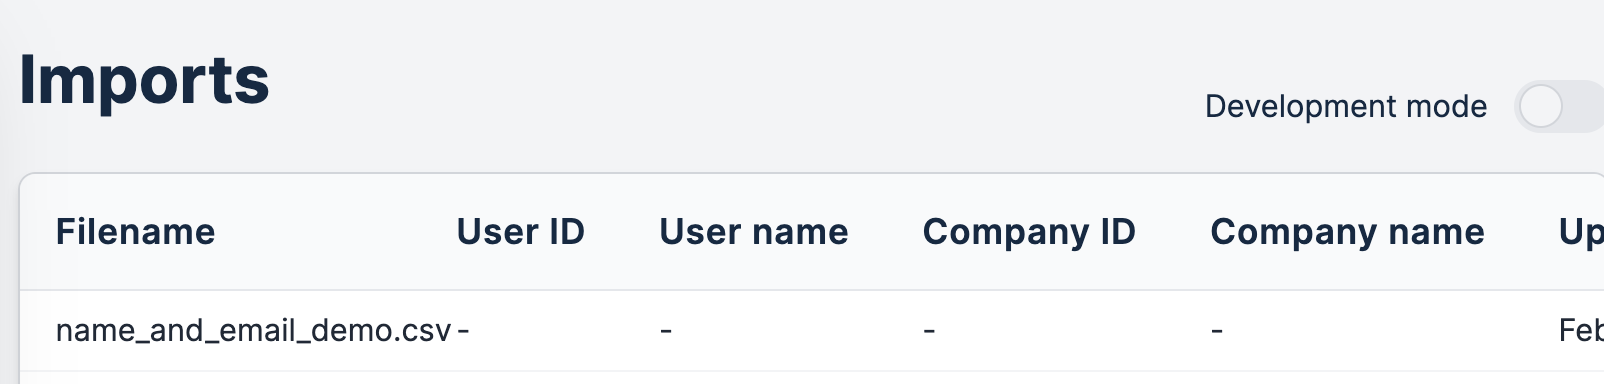
Currently, your importer doesn't know *who* is using it to upload information. If a user uploads data, there is no associated metadata for that user, so all user-related fields are left blank:
Copy and paste the pop-up code block into your own website's code and you're done! 🎉 You should be able to test the flow now.
You can see your user's imports from the [**Imports** Tab](https://dashboard.dromo.io/imports) in your Dromo dashboard.
However, to integrate into your application, you will still need to handle the data, which you can do via the [`onResult` callback](/reference/results).
```javascript JavaScript theme={null}
dromo.onResults((response, metadata) => {
// Connect to our database
db.connect();
// create new entries in our database using the user's imported data
db.uploadData(response);
});
```
```jsx React theme={null}
// Connect to our database
db.connect();
// create new entries in our database using the user's imported data
db.uploadData(response);
}
>
```
## Advanced Usage
### Assigning User Metadata
Currently, your importer doesn't know *who* is using it to upload information. If a user uploads data, there is no associated metadata for that user, so all user-related fields are left blank:
 However, you can add more context to an upload by setting user metadata about the end user to associate with an import:
```javascript theme={null}
const dromo = new DromoUploader("YOUR_LICENSE_KEY", "YOUR_SCHEMA_ID");
// Create a user object to associate imports to
const user = {
id: '1',
name: 'Jane Doe',
email: 'jane@dromo.io',
companyId: 'Dromo',
companyName: '12345'
};
// Associate the above user to this import
dromo.setUser(user);
```
### Development Mode[](#development-mode "Direct link to Development mode")
The `DromoUploader` offers a "development mode" for testing import flows or iterating on finishing touches. Dromo doesn't charge you for data you import in development mode, but you are restricted to only importing 100 rows for any given file.
Your importer runs in development mode by default if you do **not** have an active Dromo subscription. To run Dromo in production, upgrade [to one of our pricing plans](https://dromo.io/pricing).
You can switch your `DromoUploader` into development mode using the `setDevelopmentMode` method, like so:
```javascript theme={null}
```
The importer now shows a development mode banner, and all incoming imports are now flagged as development imports and you don't get charged for them!
However, you can add more context to an upload by setting user metadata about the end user to associate with an import:
```javascript theme={null}
const dromo = new DromoUploader("YOUR_LICENSE_KEY", "YOUR_SCHEMA_ID");
// Create a user object to associate imports to
const user = {
id: '1',
name: 'Jane Doe',
email: 'jane@dromo.io',
companyId: 'Dromo',
companyName: '12345'
};
// Associate the above user to this import
dromo.setUser(user);
```
### Development Mode[](#development-mode "Direct link to Development mode")
The `DromoUploader` offers a "development mode" for testing import flows or iterating on finishing touches. Dromo doesn't charge you for data you import in development mode, but you are restricted to only importing 100 rows for any given file.
Your importer runs in development mode by default if you do **not** have an active Dromo subscription. To run Dromo in production, upgrade [to one of our pricing plans](https://dromo.io/pricing).
You can switch your `DromoUploader` into development mode using the `setDevelopmentMode` method, like so:
```javascript theme={null}
```
The importer now shows a development mode banner, and all incoming imports are now flagged as development imports and you don't get charged for them!
